


1
How to launch your own cryptocurrency (token) and which blockchain to choose?
Attention! The article is outdated and awaiting an update.
Is it possible to issue your own cryptocurrency? Yes, but there are different paths. The first is to create a new blockchain. This is the most complex route and makes sense only if you have a unique idea, substantial funding, a strong team of developers and time. Launching and growing a currency this way can take years. As this is an exceptional case, it is not covered here.
The second route is cheaper and more practical: create a token on an existing blockchain. It suits developers with limited resources who want an internal currency for a project or simply to experiment. That is the scenario we examine below.
2
How to issue a token on Ethereum?
The Ethereum blockchain lets even people without programming skills issue tokens. Think of it as a digital kit: change a few lines in the ERC‑20 standard’s source code and deploy it to the network. The process takes no more than 20 minutes.
Step-by-step
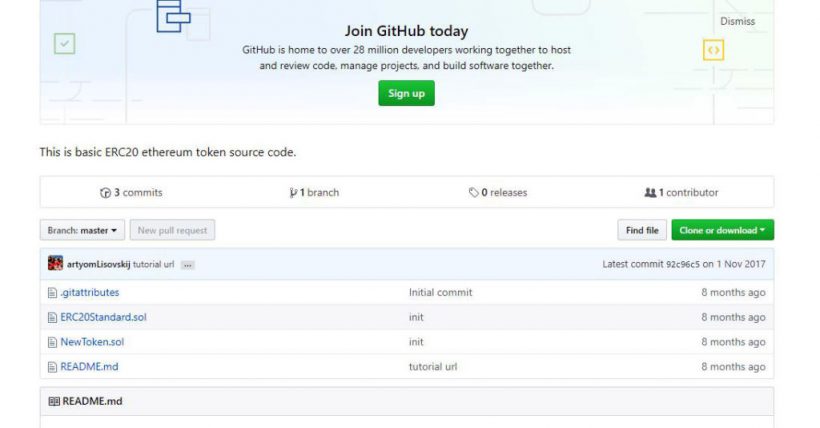
1. Decide on the token’s name, ticker, total supply and divisibility, then enter these into the system. Download the standard smart‑contract template (two .sol files) here:


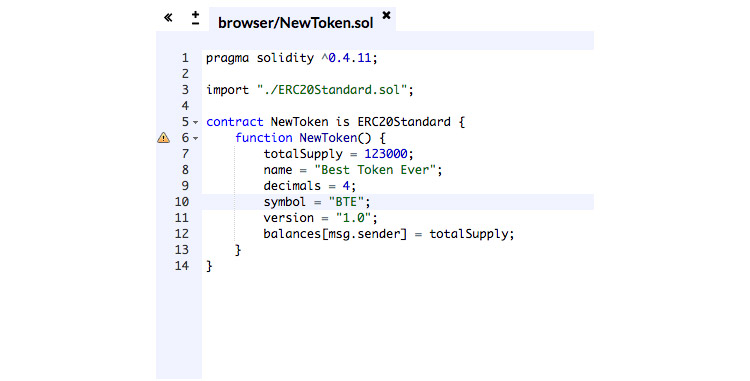
2. Upload both files to the Ethereum Remix editor using the load button or the “Folder” icon.


3. In the NewToken.sol file open in Ethereum Remix, replace the placeholder variables (in angle brackets) with your chosen values from step 1:
- token supply — totalSupply;
- full token name — name;
- number of decimal places — decimal (since contracts store only integers, you specify the number of digits to allow fractional token amounts);
- token ticker for exchanges — symbol.


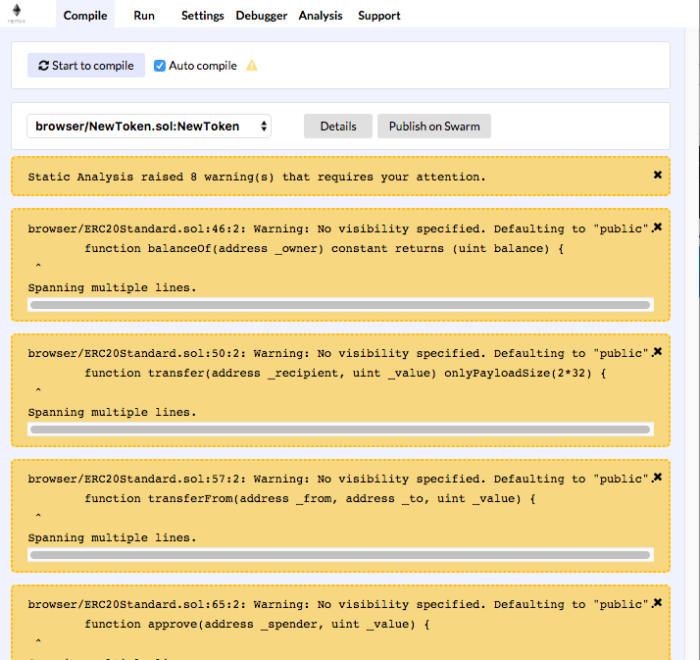
4. After saving, deploy the token contract using a browser wallet such as MetaMask. MetaMask cannot compile smart contracts, so compile in Ethereum Remix: open the Compile tab on the right and click Start to compile. Tick the box to compile automatically.


5. To deploy the smart contract via MetaMask, in Remix open the Run tab and select Injected Web3, then fill in Gas limit and Value and click Create (the deploying account is loaded automatically from the page). Click “Submit” to write to the blockchain.

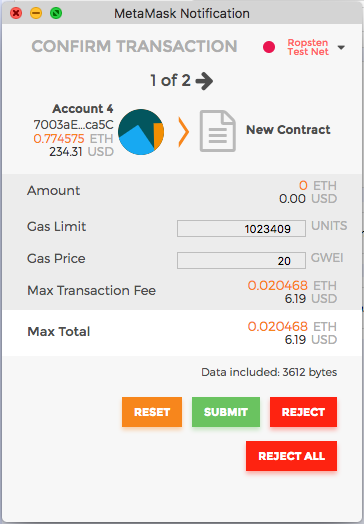

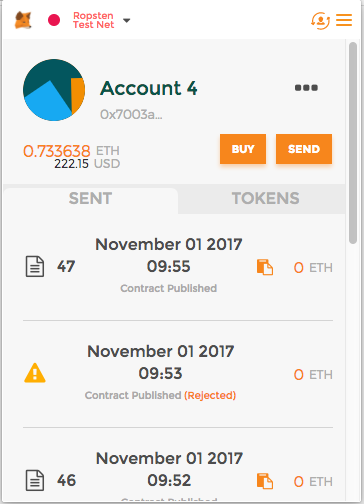
The contract is deployed. The status is confirmed in the client by a “document” icon and the caption “Contract published”. Clicking it opens the transaction page.


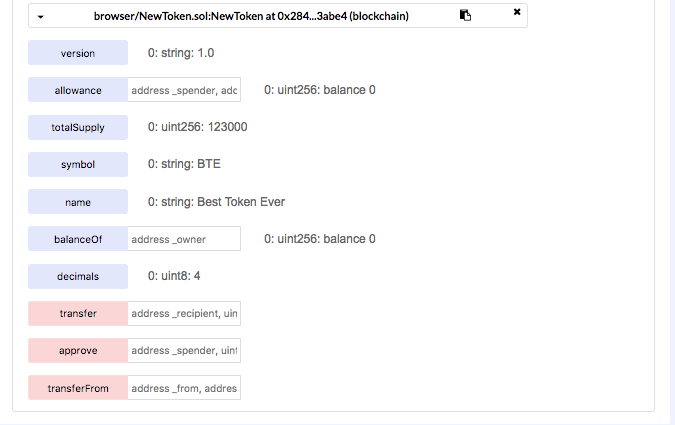
6. To make payments with the new token, you need the sender’s and recipient’s account numbers (addresses).
You can operate the token either on the contract page on etherscan (link in MetaMask) or in Ethereum Remix. Paid write operations are shown in pink; free read operations in blue.
To send tokens, specify the amount and the recipient’s address. To check the balance after a transaction, run the balanceOf operation.


3
How to issue a token on WAVES?
Waves is a blockchain platform for issuing digital coins. According to the platform’s site, creating a new token takes a minute.
Step-by-step
1. Install the Waves Lite Client.
2. Create a new account on Waves.Exchange.
3. Launch the app.
4. In the top right, click “Create token” (first make sure you have at least 1 Waves to pay the token-creation fee).


5. In the “Issue Token” form, fill in “Token Name”, “Description”, “Total Tokens” (you can fix the total supply at issuance or increase it later by choosing “Re-issuable”), and “Decimal Places”.

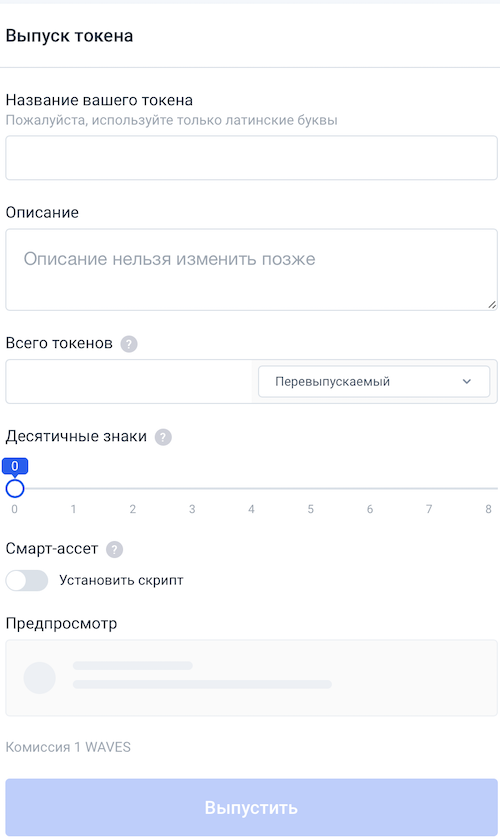

6. After checking the entries, click “Issue”.
7. Click “Send”; the token will appear in the “Portfolio” tab.


4
How to issue a token on EOS?
On EOS smart contracts, the token standard is called eosio.token.
Step-by-step
Note: The “url” parameter shows which node the user is connected to. You can find API endpoints on the project’s official site.
1. Install cleos — a command-line utility for interacting with EOS nodes (nodeos) via the REST API — using Docker, AWS Image or compatible source code (to interact with the EOS blockchain, you send commands to cleos).
2. Create a wallet, two key pairs for owner and active permissions, and import them into the wallet.
3. Create an account. If you already have an account with EOS tokens, you can create a local account by running cleos create account, but you cannot create a mainnet account for free. To save money and time, create an account on the test network, EOS Jungle Testnet. Go to jungle.cryptolions.io, click “Create Account”, enter the account name and the two public keys you generated earlier, and confirm the creation.
4. To publish the contract, transfer a few EOS to your account on a dedicated page using the EOS Jungle Testnet Faucet, then run cleos system buyram to buy RAM with EOS.
5. To upload the contract to the blockchain, run cleos set contract and set the parameters: account — the account the contract belongs to; contract-dir — the contract directory; wast-file — a WAST or WASM file containing the contract; abi-file — the contract’s ABI description (links: wast/abi). If you build the contract from source, you will need the ./build/contracts/eosio.token/ folder. In set contract, enter the account name. Since the wast/abi files share the directory name, you can omit those parameters. Then check whether the code has loaded.
6. To create the token, run the create and issue actions via the push action command, specifying: contract — the account the contract is tied to; action — the action to execute under this contract; data — the contract terms.
7. To transfer tokens from one account to another: in cleos, run push action and transfer, create an account (just as with ylvdeveloper), send tokens and verify balances.
On mainnet everything works the same way, but you must use different API endpoints and pay for accounts and RAM.
5
How to issue a token on Ripple?
You can create a token in the XRP Ledger, which lets participants issue credit (digital IOUs) for any purpose by minting tokens that represent the value of currencies, services, property, and so on.
Step-by-step
1. Go to The World Exchange (an exchange and wallet interface for Ripple), and in the top right click Login or Create a Ripple Account. If you are creating a new address, you must first send at least 25 XRP to it: 20 XRP to open a token-issuance order and 20 XRP to activate the wallet.

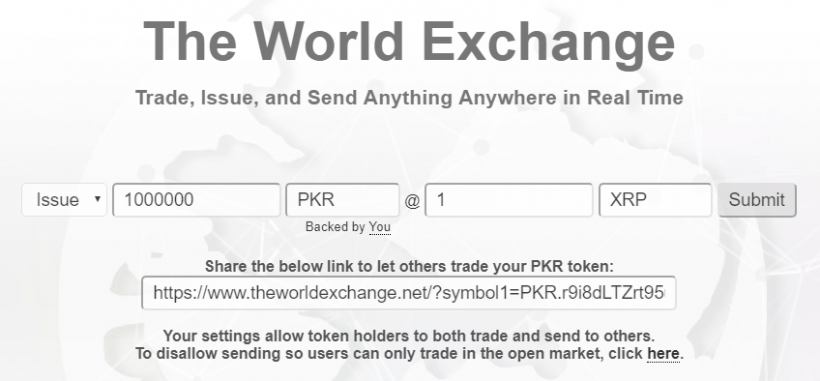

2. In the site interface on the left, choose “Issue”, then specify the amount and ticker of the token, as well as the price and the ticker of the base currency for the token being created.
3. After issuing the token, set defaultRipple = true in the settings to allow sending the new token to other wallets. Without this, holders will only be able to buy and sell it, not send it. The site will automatically generate a link to the trading pair, which you can share with prospective buyers.
6
How to issue a token on the TRON blockchain?
Step-by-step
1. Go to Tronscan.
2. Sign in and choose the token type: TRC‑10 on a standard smart contract or TRC‑20 on a custom smart contract.
3. Fill in the token information and confirm creation. The site will insert the token data into a smart‑contract template and publish the smart contract to the blockchain.
4. If you are writing a smart contract for TRC‑20 tokens, paste the contract code into the form and confirm publication.
5. For TRC‑10, the network will deduct 1,024 TRX from your wallet. If you do not wish to pay, you can install the TronBox development environment and write the smart contract yourself.
Subscribe to ForkLog news on Telegram: ForkLog Feed — the full news feed, ForkLog — the most important news and polls.