

Step-by-step guide: how to use Trust Wallet
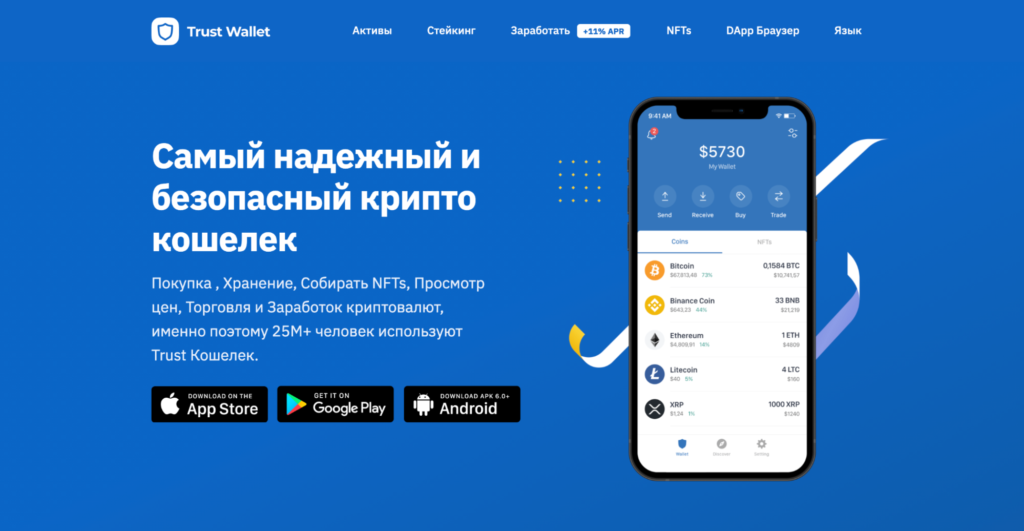
Using and storing cryptocurrency should be straightforward and easy. A few years ago Trust Wallet became part of the Binance ecosystem, and it has continued to evolve since.
Initially it specialised in Ethereum assets, but in late 2018 the team announced support for Bitcoin. It is now one of the world’s most popular multicurrency wallets.
Many built-in features make interacting with digital assets easier. In addition to storing funds, Trust Wallet lets you buy cryptocurrency, participate in staking, store NFT tokens, and use a dapp-browser for trading on decentralized exchanges.
This step-by-step guide will help you understand how to use the wallet and how to transfer cryptocurrency to it.
Registration and setup of the wallet
To start using the wallet, download it in Google Play or App Store on your mobile device. Recently, Trust Wallet not available in the App Store for users in Russia — likely tied to sanctions over Russia’s invasion of Ukraine.
Wait for the installation to finish and proceed to create a new wallet. Follow the on-screen instructions.
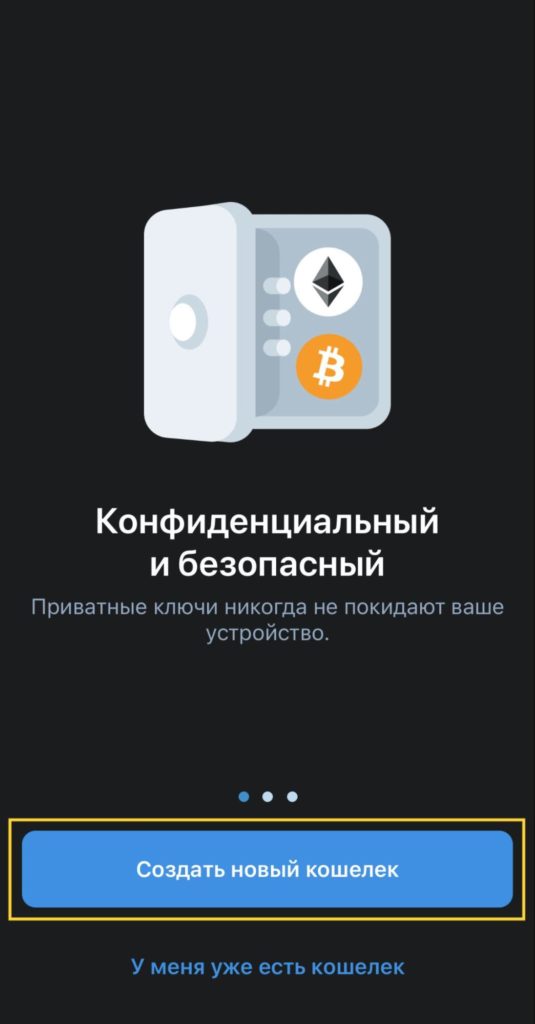
Step 1. Tap Create a new wallet, if you are not registered yet. Choose I already have a wallet if you have previously registered in the app and you have a seed phrase (the secret recovery phrase).
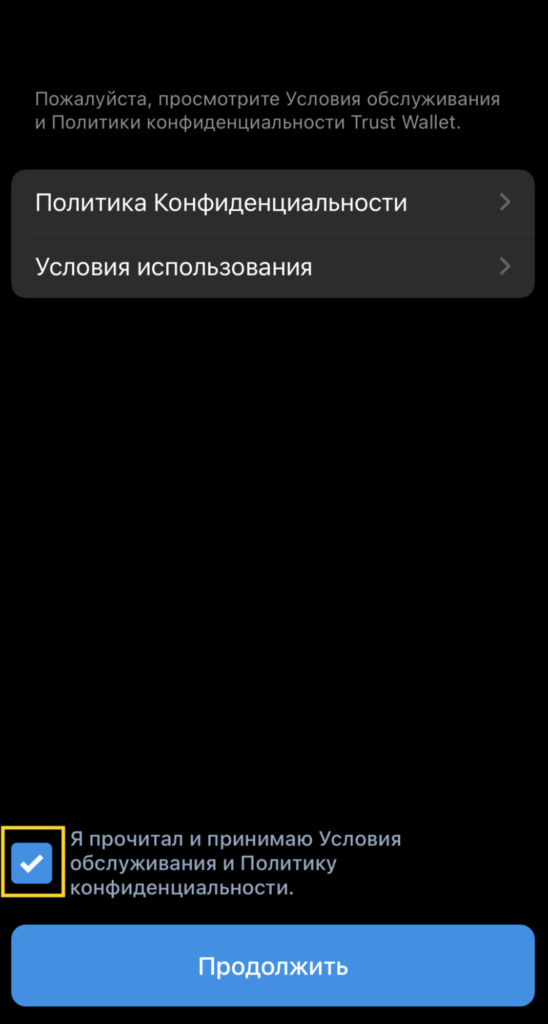
Step 2. Carefully review the items on the screen related to the recovery seed phrase. It is a random 12-word sequence in English and serves as the recovery password should you lose access to your mobile device or wallet. Make sure the seed phrase is kept secure: do not share it with anyone, write it down and store it in a safe place known only to you.
Remember: if the seed phrase is lost or stolen, you will lose access to your assets. Check off each item, then press Continue.
Step 3. Write down or copy the words you will see on the screen. Tap Copy if you want to transfer the seed phrase to an electronic format, for example, to cloud storage. It is safer to store it on offline media.
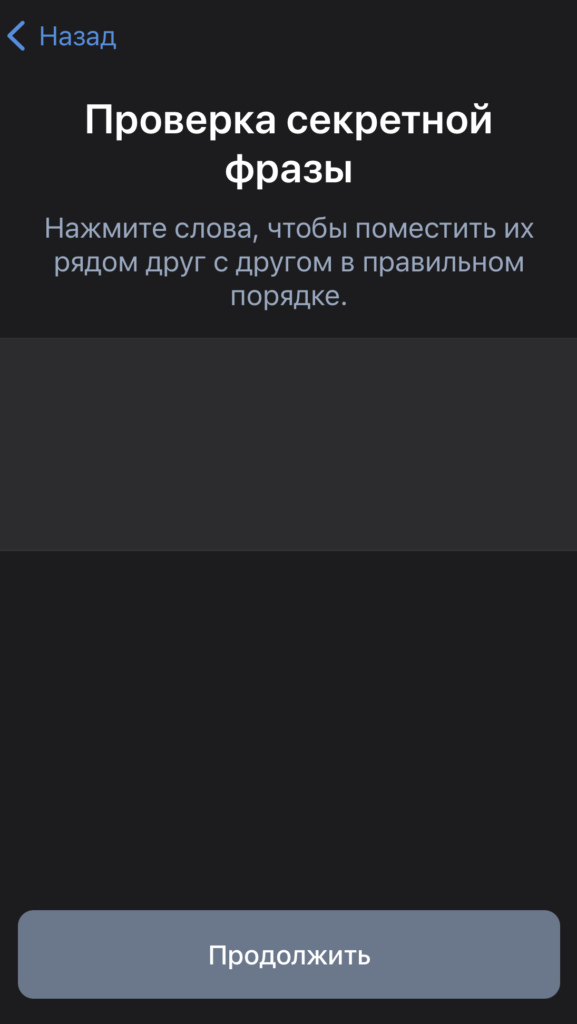
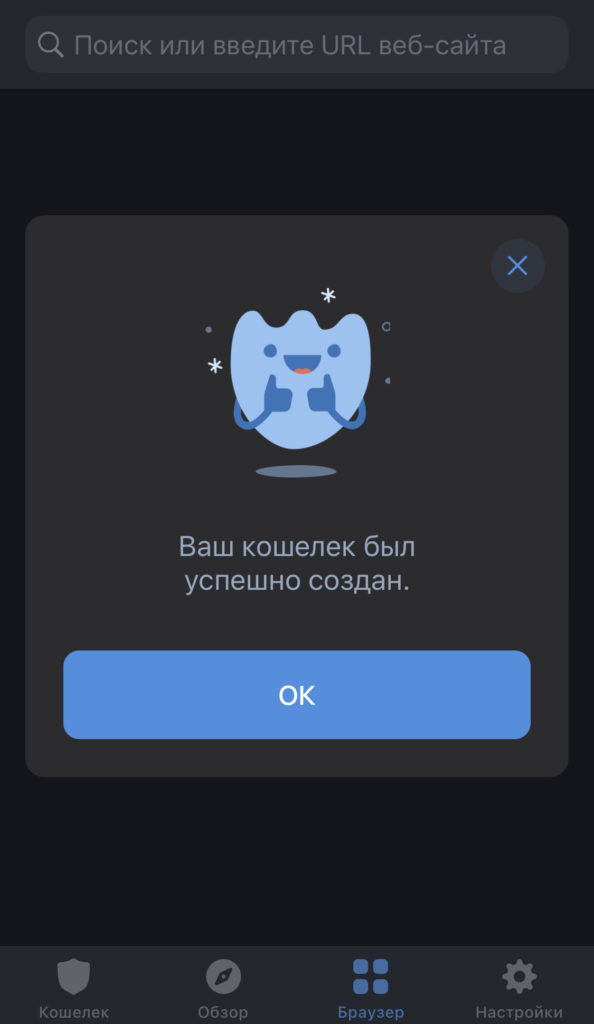
Step 4. After you press Continue, you must repeat the phrase in the correct order. Make sure you have correctly copied and written down the seed phrase. After you enter the words in the correct order, press Continue again. The wallet is successfully created and ready for use.
How to add or remove a crypto asset from the wallet
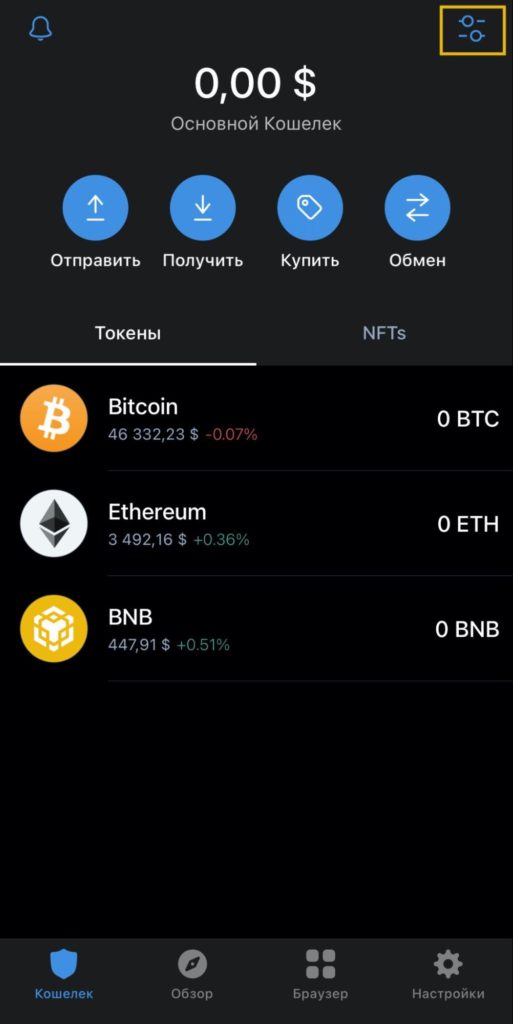
The main advantage of the wallet is its multicurrency support. Trust Wallet supports 53 blockchains and more than 1 million assets. By default, the main screen shows only three: BTC (Bitcoin), ETH (Ethereum), BNB (Binance Coin).
Key networks and tokens that Trust Wallet supports:
- Ethereum (ETH) and ERC-20 tokens;
- Bitcoin (BTC);
- Bitcoin Cash (BCH);
- Litecoin (LTC);
- Ripple (XRP);
- Ethereum Classic (ETC);
- Tron (TRX) and TRC-20 tokens;
- Dogecoin (DOGE);
- Cosmos (ATOM);
- Binance Coin (BNB) and BEP-20 tokens.
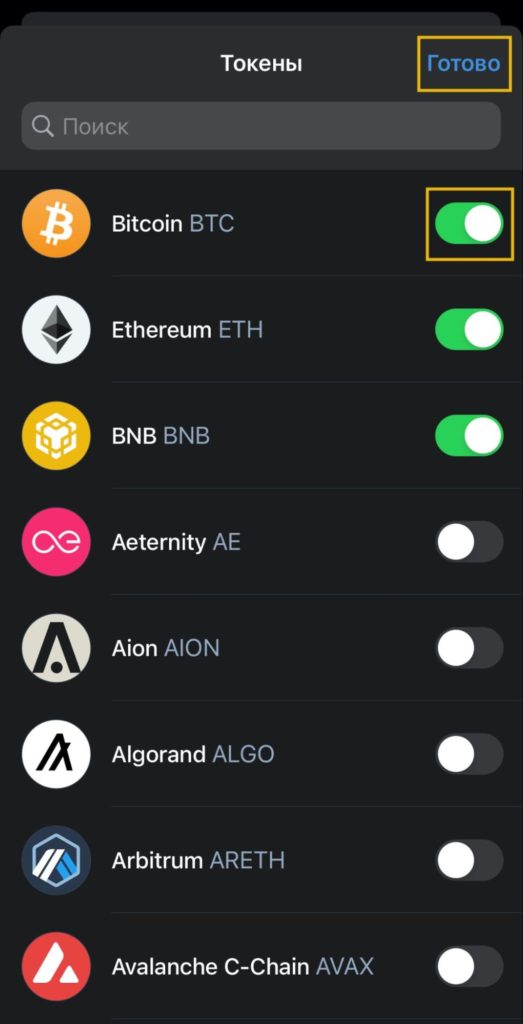
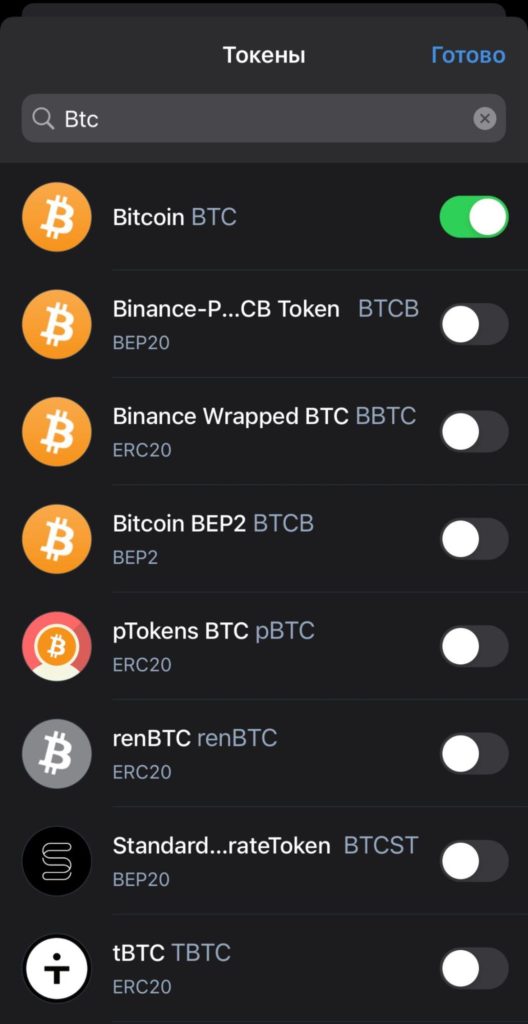
To add or remove a coin/token, tap the icon in the top-right corner of the interface. Then in the search bar, enter the name of the desired crypto asset. For example, add the US dollar-stablecoin USDT.
Note that the asset row displays many different USDT tokens. Choose the one for the network you plan to transact on. For example, USDT can be sent on the Ethereum network (ERC-20), on BNB Chain (BEP-20), or on the Tron network (TRC-20). Be careful when selecting the network for both sending and receiving.
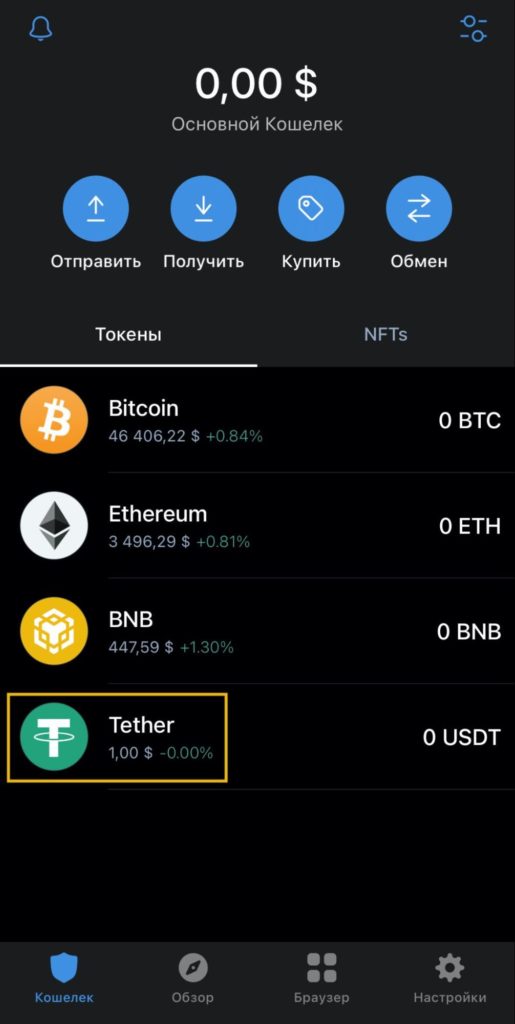
With the green toggle you can add or remove an asset from the main page of the wallet. Return to the main screen to see changes in the Tokens.
How to top up the wallet balance
There are several ways to fund Trust Wallet: transfer funds from another wallet, use a transfer from an exchange, or buy cryptocurrency directly in the app with a bank card. This guide will examine the latter two options in detail.
How to buy cryptocurrency inside the Trust Wallet app
The wallet includes a built-in option to buy cryptocurrency through Trust Wallet’s partner services. This option allows you to receive coins instantly into the wallet, but there are some conditions:
- The app does not sell cryptocurrency; you will be redirected to third-party providers, among which: Ramp; Transak; Mercuryo and Simplex.
- Providers charge a fee for conversion and network.
- The minimum transaction is $50 and the maximum is $20,000.
Note that buying cryptocurrency via partner services will cost more than a regular exchange transfer. The price difference between the exchange and the app ranges from 2.5% to 7%. It is cheaper to buy on an exchange and then transfer to the wallet.
If you chose the card purchase option, go to the wallet’s main page, then to the Buy.
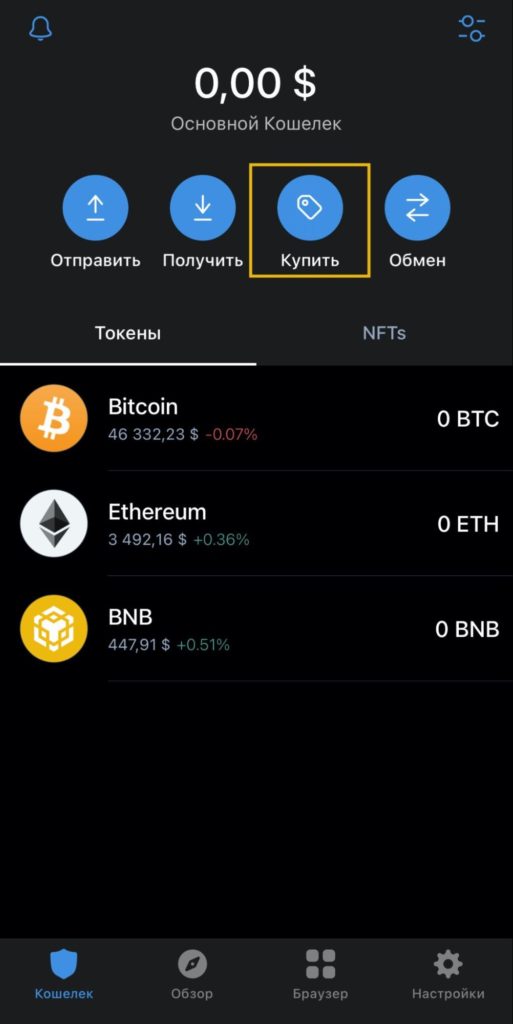
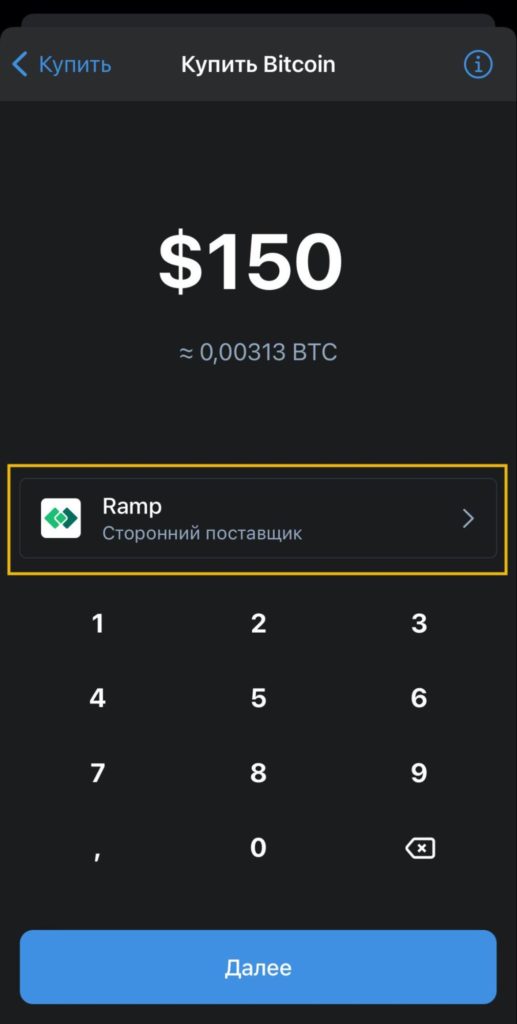
Enter the desired cryptocurrency in the search, for example Bitcoin, and set the purchase amount in dollars. In the menu below you can select a third-party provider. A user verification check is required before purchase; then follow the on-screen instructions. After confirmation the cryptocurrency will be credited to your account.
How to transfer cryptocurrency from an exchange to the wallet
The process of funding the wallet from an exchange account is the same for any coin or token. For example, we’ll top up Bitcoin (BTC), Ethereum (ETH) and the USDT stablecoin.
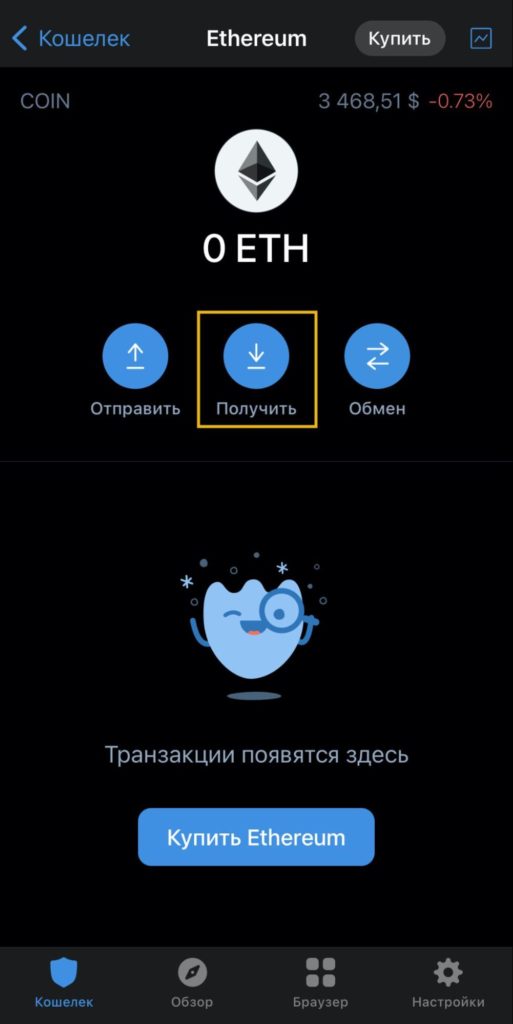
Step 1. Go to the main screen of the app. In the Tokens menu, select the crypto asset or press Receive. To transfer funds to the account you need the wallet address.
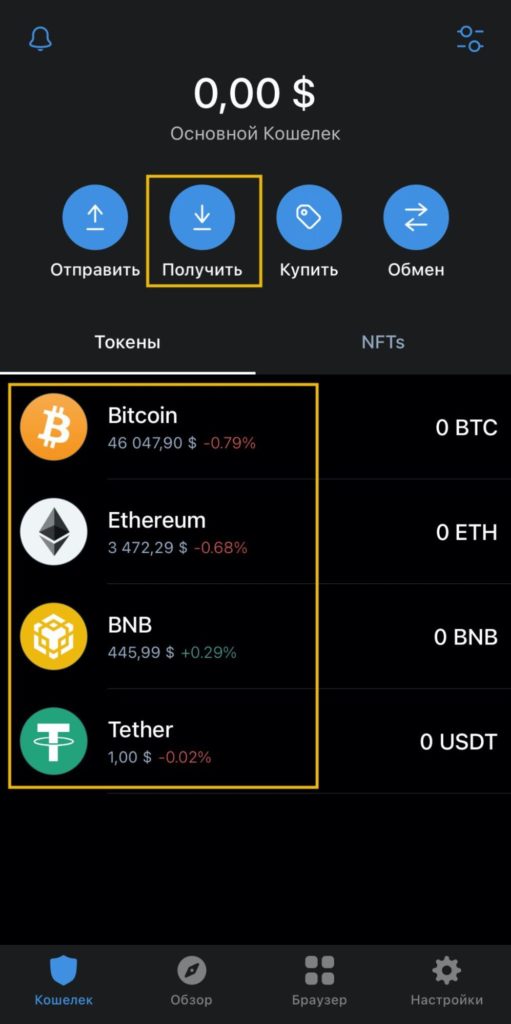
How to find the address? On the main screen of the wallet, select, for example, Ethereum, and then press Receive.
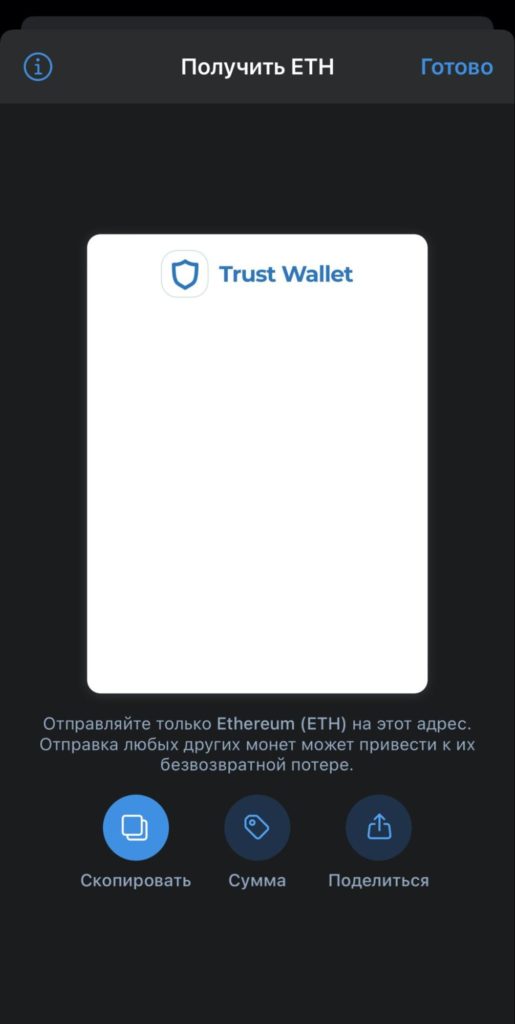
To get a Bitcoin (BTC) address or a USDT address, repeat the previous steps.
Step 2. Suppose you have already purchased BTC, USDT or ETH and assets are stored in the spot wallet. Consider transferring from Binance.
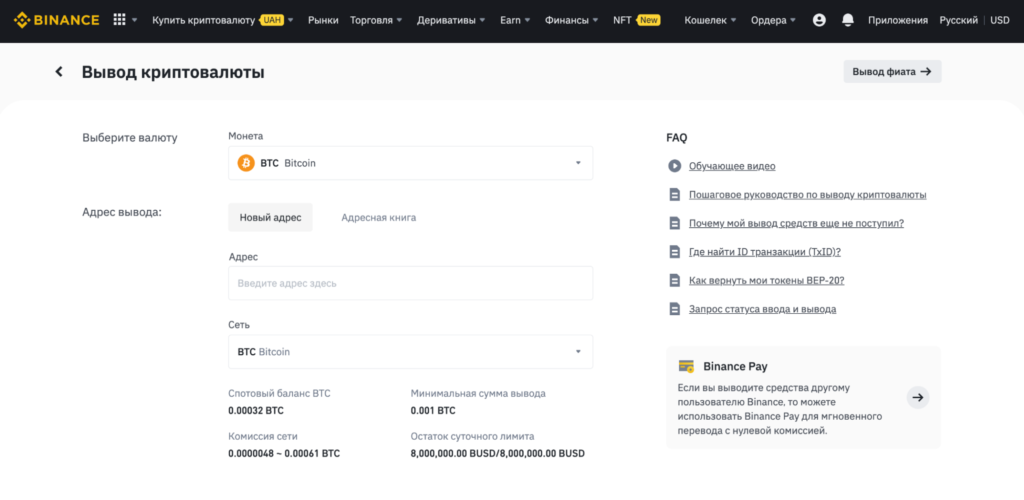
Open the Wallet section and choose Fiat and Spot. In the menu find the row for the desired cryptocurrency. Each crypto will be sent to the wallet separately. Choose Withdraw cryptocurrency.

In the line Choose currency, e.g., Bitcoin. Paste the wallet address you copied earlier into the withdrawal address.
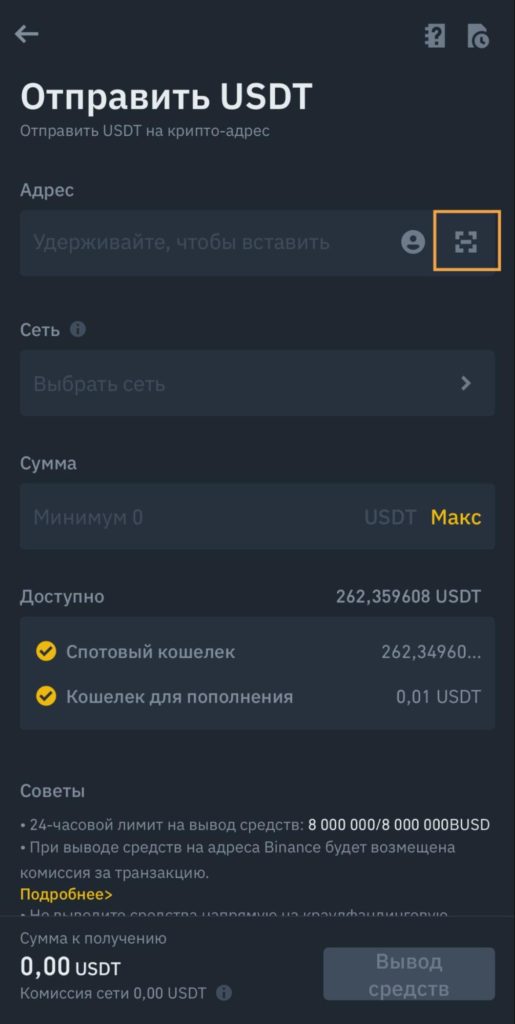
The funds can also be withdrawn to the wallet from the Binance mobile app. This option is convenient because you can scan the unique QR code generated in Trust Wallet. To use this feature, tap the icon highlighted in the yellow square and follow the instructions on the screen.
Step 3. After you have chosen the cryptocurrency, entered the copied address or scanned the QR code, press Select Network.
Each network has its own characteristics: speed, minimum withdrawal amount and transfer time.
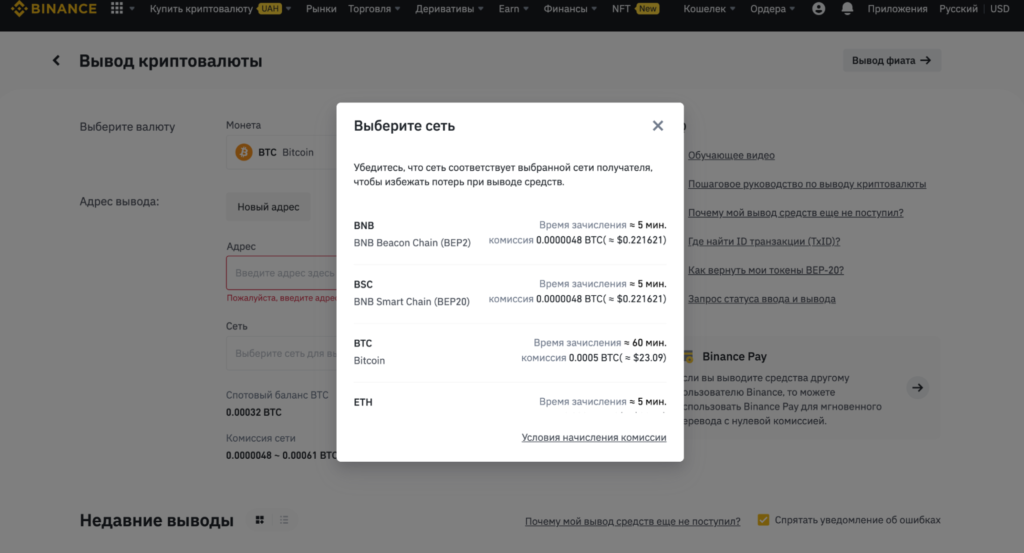
For example, to withdraw Bitcoin you can choose from several networks:
- BNB Beacon Chain (BEP-2), credit time ~5 min, fee ~0.0000048 BTC.
- BNB Chain (BEP-20), credit time ~5 min, fee ~0.0000048 BTC.
- BTC Bitcoin, credit time ~60 min, fee 0.0005 BTC (~$23.09).
- ETH Ethereum (ERC-20), credit time ~5 min, fee 0.00061 BTC (~$28.16).
Fees on the Ethereum and Bitcoin networks are significantly higher than on the BEP-2 or BEP-20 networks. Transfer times vary as well. Take all parameters into account and choose the option that best suits the wallet.
See available networks in the Tokens menu of Trust Wallet. Ensure that the withdrawal is made on the network specified in the wallet. Otherwise an error will occur and funds will be lost.
After you have entered all details and selected a suitable network, press the Withdraw button and confirm the transfer to the exchange. Congratulations! The operation completed successfully—you have transferred funds to the wallet.
Read ForkLog’s Bitcoin news on our Telegram — crypto news, prices and analytics.
Рассылки ForkLog: держите руку на пульсе биткоин-индустрии!